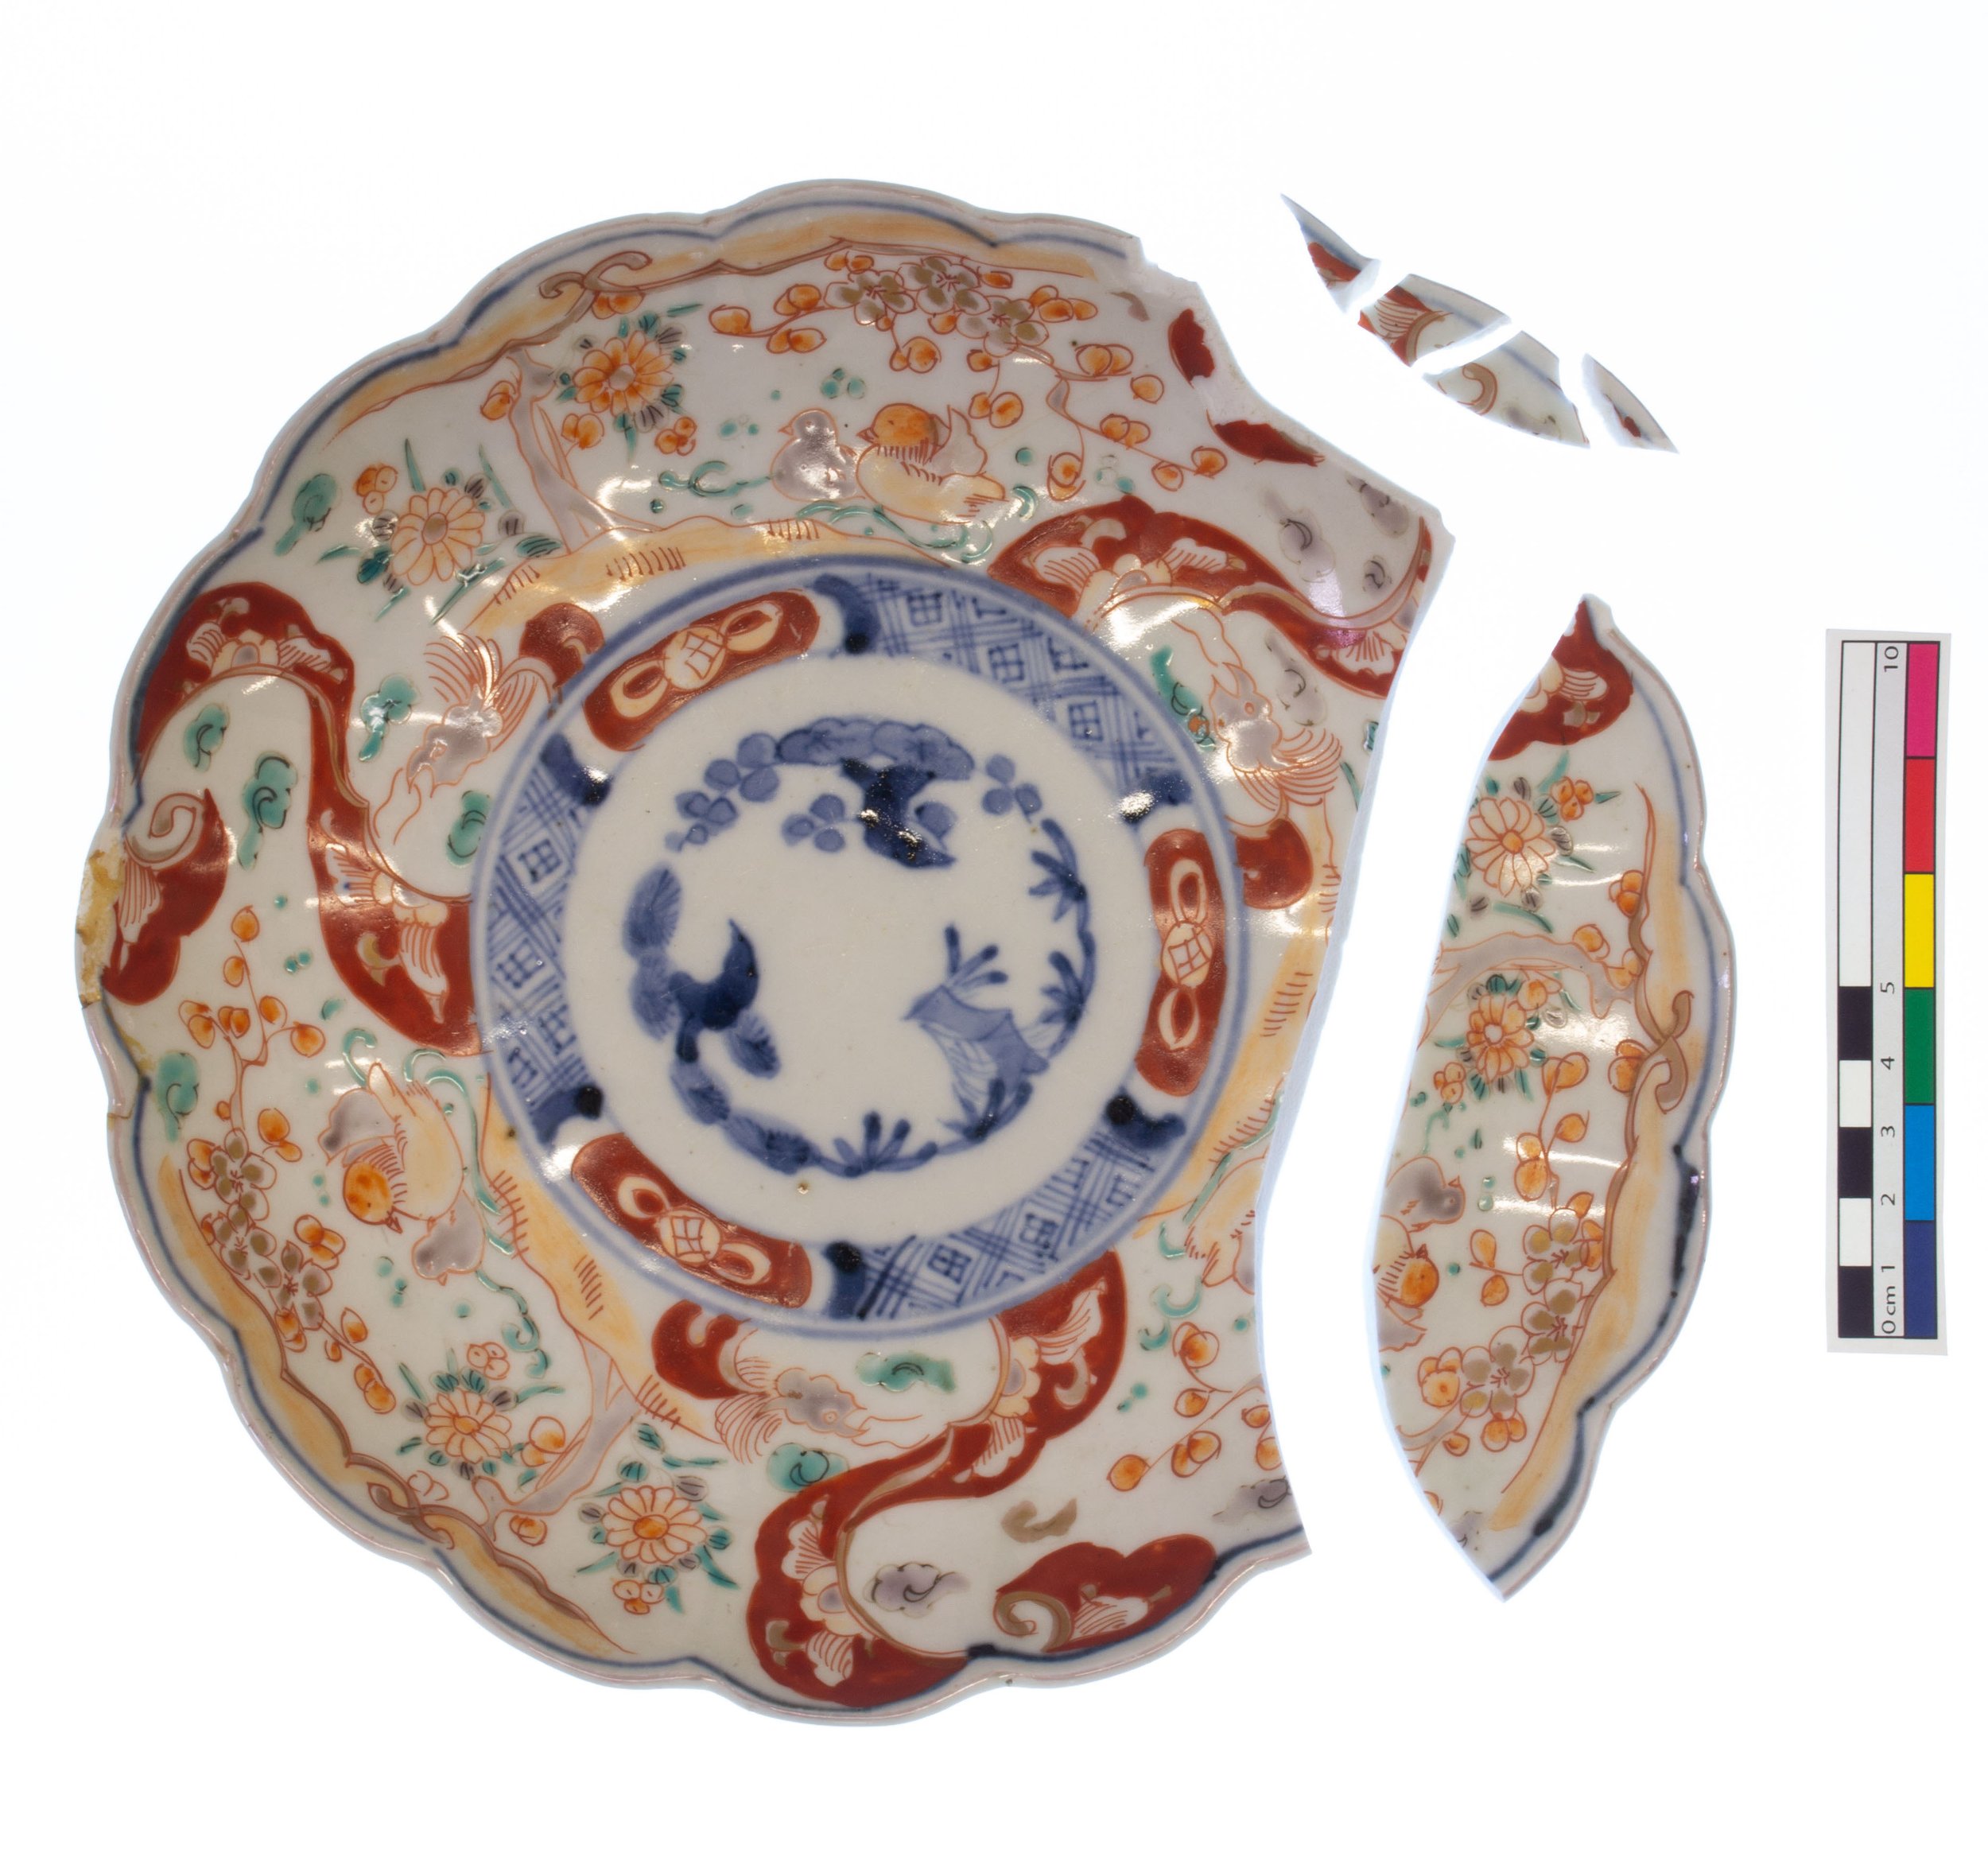
Porcelain Charger
This Chinese hard paste porcelain charger came to the Institute of Archaeology through a private owner. It was broken into multiple pieces, with losses around a particularly complex scalloped edge. Its decoration, which includes enamelling added in three firings, added a unique challenge to creating harmonious fills.


Treatment
Cleaning
Removal of old adhesive first using mechanical action with #15 scalpel, then with acetone using cotton swab. At this point, the small shard was still firmly attached so cotton was lightly soaked with acetone, applied to the area, covered with aluminium foil, and left for 30 minutes. Shard came loose and adhesive on ceramic edges was softened. Adhesive on edges was repeatedly cleaned with acetone on cotton swab.
Surface cleaning was conducted first using Smoke Sponge (vulcanised natural rubber), makeup sponge (hydrophilic polyurethane), and Groomstick (modified natural rubber) to remove loose debris, then 50/50 deionised water and ethanol on cotton swab.
Edge cleaning to address light soiling was first attempted using Smoke Sponge, makeup sponge, and Groomstick, which resulted in little change. For a deep clean of the edges, loose shards were submerged in a mixture of 1% w/v Fairy detergent (sodium carbonate peroxide, sodium carbonate, sodium dodecyl benzenesulfonate, with sodium silicate, C14-15 Pareth-7, and citric acid) in deionised water for 10 minutes and then gently brushed along edges with a toothbrush. This process was repeated on the shards while cotton wool was soaked in this mixture and applied the area of pre-existing adhesive on the main body of the plate to remove residual staining. All edges were gently brushed again with the toothbrush. Plate was then rinsed three times and edges lightly brushed with deionised water to remove residual detergent.
Reconstruction
Dry reconstruction was completed using FrogTape® Multi-Surface tape. For the tightest joins possible, Hxtal NYL-1 (epoxy resin) was chosen as the adhesive, applied using capillary action because of the risk that—should the small shards be joined separately and attached later—the fragments would not fit back on to the body of the plate. To address this, small pieces along the edge were fixed in place with FrogTape® Delicate Surface Painter’s Tape and adhered at the same time as the other sherds.
After the resin on the reverse of the plate had safely cured (about 7 days). The tape was moved so that areas previously covered were uncovered and more resin applied in those gaps. Excess resin was removed with acetone on cotton swabs or a #15 scalpel.
Loss Compensation
Once resin had cured and been cleaned from joins, Flügger (butyl methacrylate and calcium carbonate) was used to fill cracks and gaps. Losses were all small enough for the use of Flügger alone as a fill material, which was applied with a stainless-steel dental spatula and, once dry, was sculpted with water on a cotton swab and abraded with 1800–6000 grade micromesh (micron graded silicon carbide crystals suspended in an ultra-flexible resin bond).
Decoration
Liquitex Soft Body Acrylic Paints (yellow oxide, ultramarine blue (green shade), ivory black, titanium white, chromium green, and cadmium-free red) were then used to colour match the plate colour and Flügger was painted with a 00 sable brush.
Once the base colour was matched, the same paints (namely ultramarine blue, ivory black, and cadmium-free red) were used to match the underglaze colour and painted on top of the base colour.
Unfortunately, this did not achieve the water-colour like effect of the blue under glaze and it had to be removed. Likewise, the largest area of red in-painting on Flügger was slightly raised and this made the fill particularly visible and distracting.
Step 8 of the reconstruction process was repeated.
To improve the finish, the acrylic paints this time were watered down significantly. Blue underglaze was painted first so that it could absorb into the Flügger and give that underglaze look. The plate colour was then painted around the underglaze. Areas that had other kinds of decoration were left unpainted at this stage as the finish was clearly improved by not over-layering the materials.
To match the semi-matte appearance of the red glaze, Pozzuoli red and mars orange dry pigments were mixed with 5% w/v Paraloid B-72 in acetone and applied with a size 2 sable brush over the larger areas and 00 sable brush in finer cracks. A 000 sable brush was used to recreate some of the finer lines lost from the break and abrasion of the fill materials.
The remaining colours: a semi-matte orange, glossy purple, and glossy blue, were all made from variations of Liquitex Soft Body Acrylic Paints with water or Golden Porcelain Restoration Glaze (water-based coating) and applied with a 00 sable brush.
Golden Porcelain Restoration Glaze was then applied as a final coat to areas that needed a high-shine finish (base plate but not enamel decoration) while 15% Paraloid B-72 w/v in acetone was used to give a slightly greater shine to the areas of red enamel fill.
Edges were then cleaned up slightly used cotton wool on cocktail sticks with acetone under a microscope.
Grade 3000 micromesh was used to slightly smooth the Golden Porcelain Restoration Glaze, with extra care taken to avoid any addition abrasion to the plate.


