Archaeological glass
Between 2021 and 2022, I retreated an archaeological Islamic glass vessel abandoned at University College London’s Institute of Archaeology by its owner. In a fragile state and sensitive to light due to previous conservation campaigns, the vessel was deconstructed and reconstructed based on the most up-to-date research. Analysis of the composition and weathering crust was conducted using Scanning Electron Microscopy, which allowed for the identification of glass type, colourant, and approximate date of manufacture.

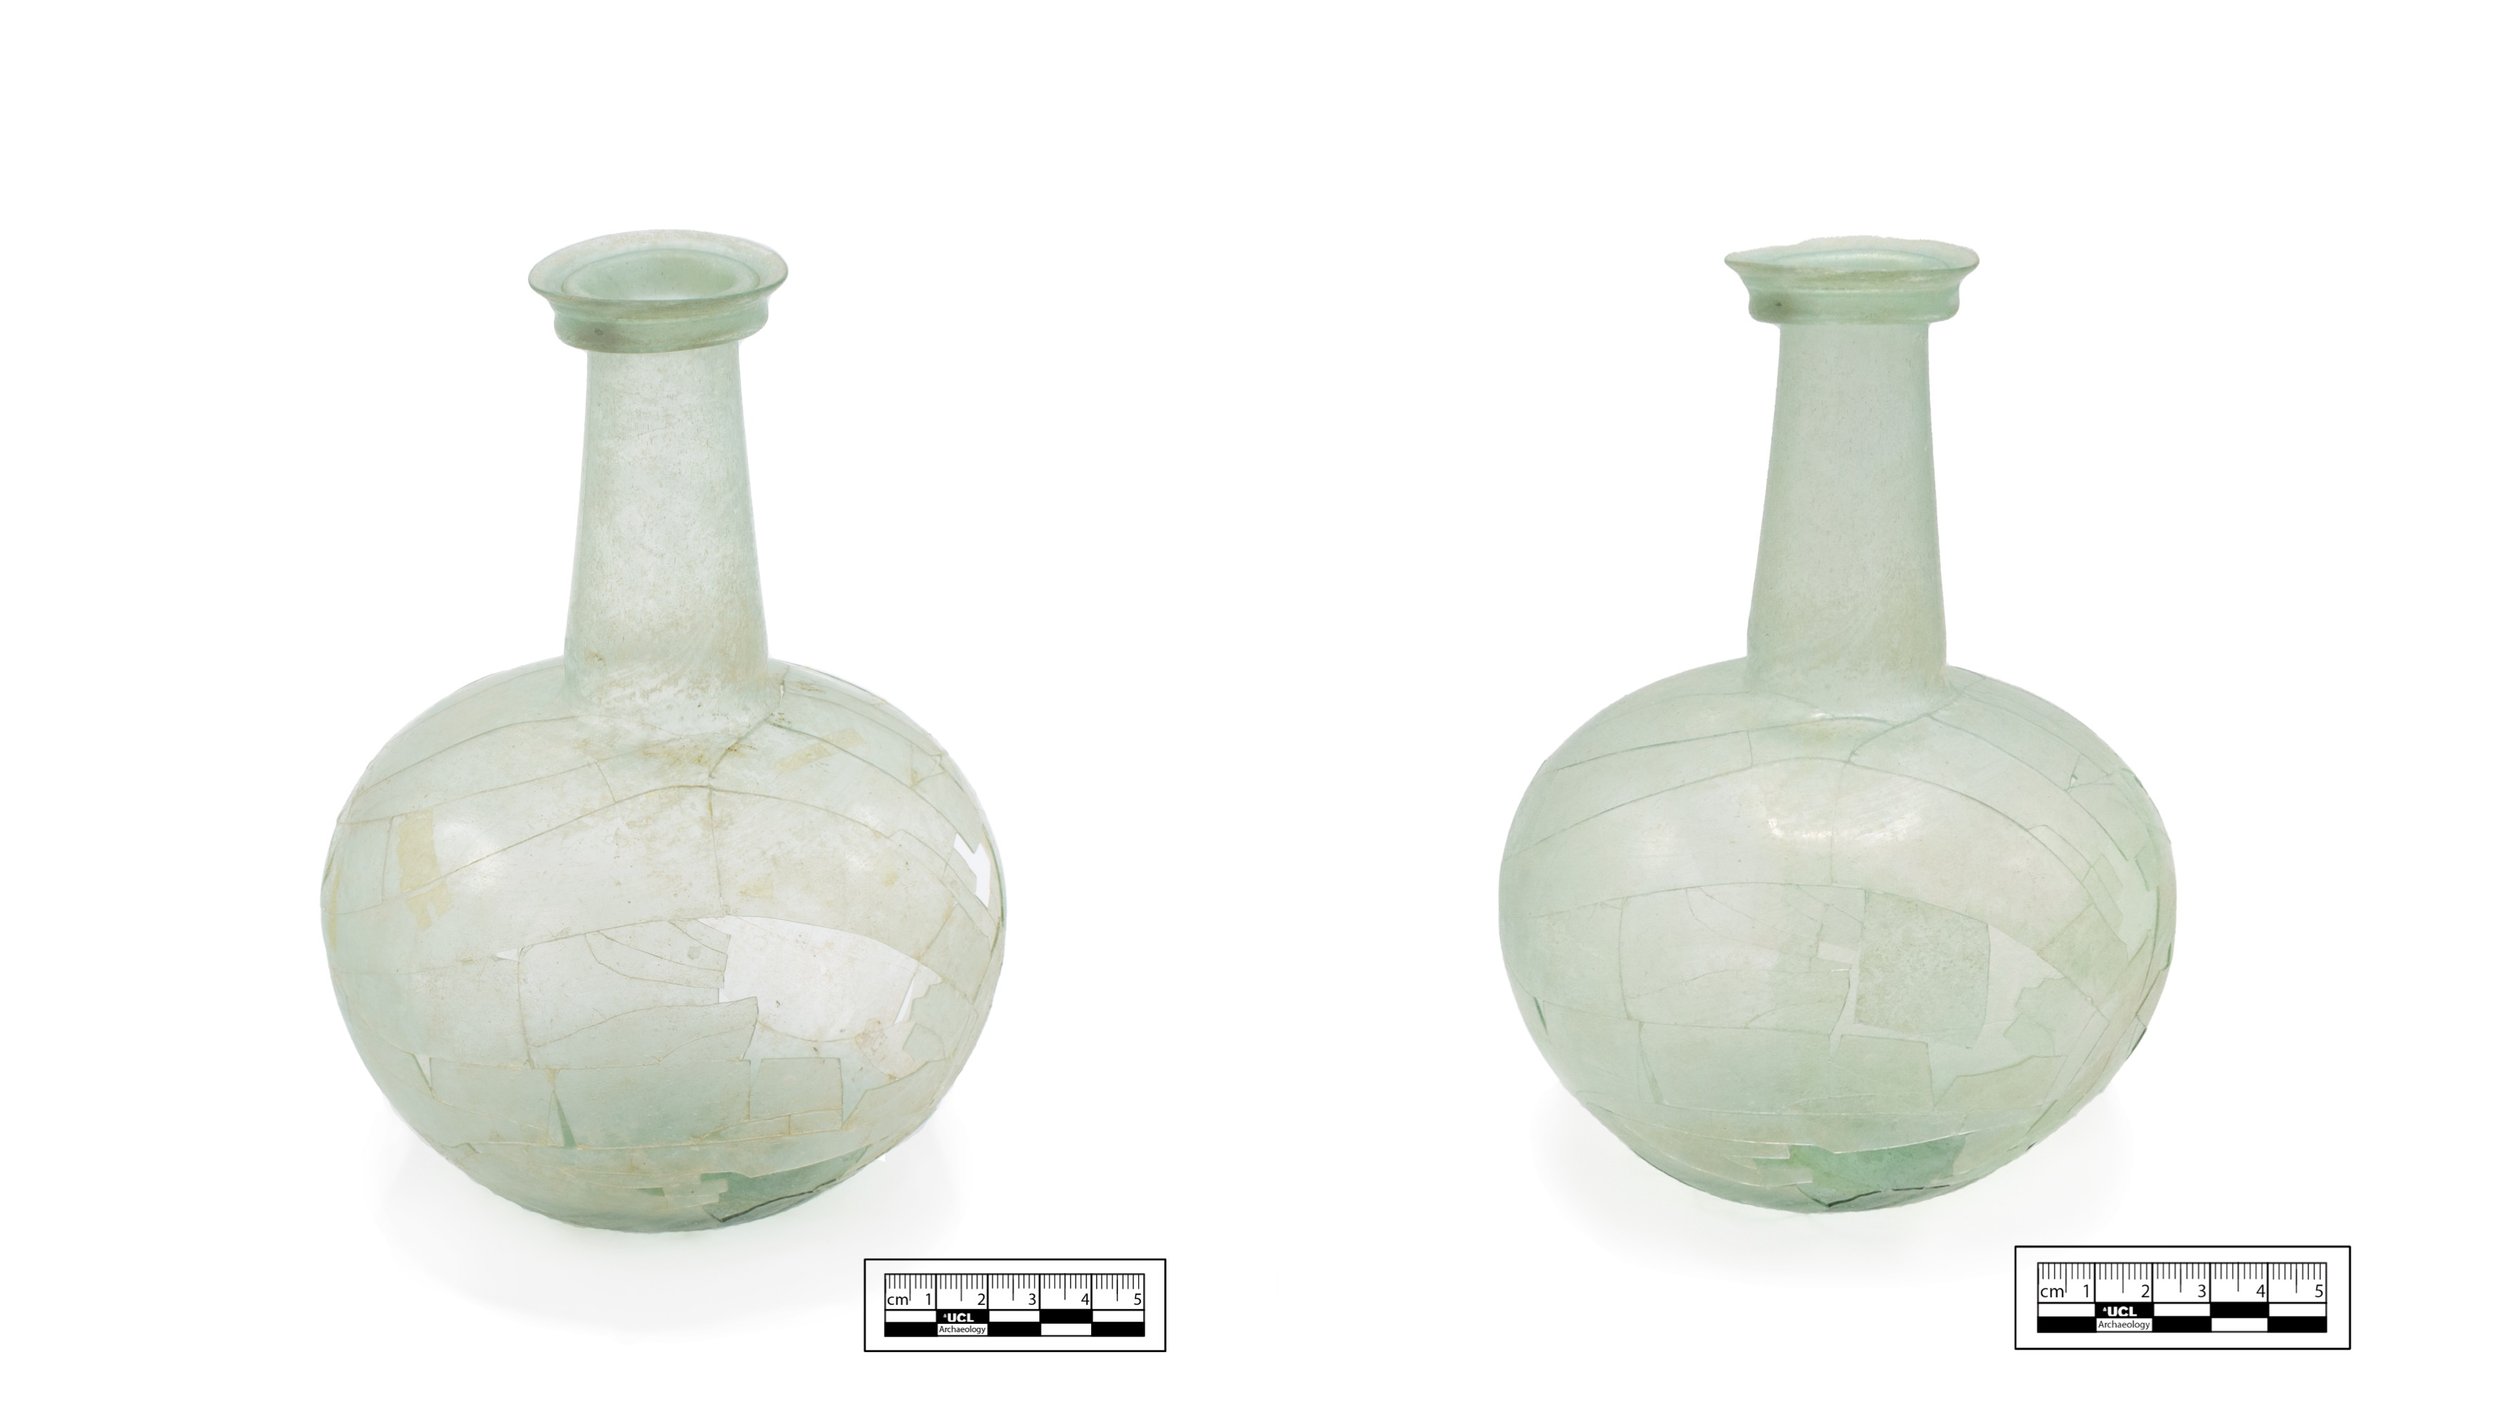
Before (left) and after (right) treatment
Context and reason for treatment
The object at the centre of this project is an undecorated archaeological glass vessel of Islamic origin. It belonged to a private collector who brought the object to University College London’s (UCL) Institute of Archaeology (IoA) in 1982 for conservation treatment. After it was treated by a student the same year, it was never collected by the owner and was left at the Institute for some time. It was further treated in 1992 and now, after 40 years abandoned in the conservation lab, it has been absorbed into UCL’s Teaching Collection.
This object was in a fragile state, held together by aged, yellowing adhesives, and needed stabilisation through retreatment. The intention was for the treated vessel to be stable enough for occasional handling as part of the Teaching Collection. Likewise, it was hoped that the reconstruction would improve the appearance of the joins and reincorporate as many loose shards as could be accurately located. The conservation treatments tested in this process were chosen to best support the object’s functional and evidentiary significances primarily through reconstruction and structural stabilisation. I also kept in mind its sensory significance by making treatments minimally invasive to the overall appearance.
Treatment Description
The vessel was deconstructed using a 24-hour solvent (acetone) atmosphere. To protect the object from collapse, it was pre-emptively stuffed with strips of acid-free tissue through the neck. Once removed from the solvent atmosphere, joins were mostly loosened but not separated, this made it possible to slowly remove pieces, annotate their positions, and count them. Shards were individually numbered and organised into sections, indicated by a letter (A-S) which streamlined the reconstruction process.
Old adhesive, including tape residue, was removed using acetone on cotton swabs under a microscope, working sequentially from 1A through 130S. Spots of epoxy resin were swabbed with acetone and then gently scraped with a #15 scalpel. Except for areas of aged tape residue, the surface of the glass was not cleaned.
Reconstruction started with the neck of the vessel which was inverted and supported by a polyethylene foam mount lined with acid-free tissue. The mount was constructed in such a way that the glass could not accidentally slip free, and weight was balanced on the base of the neck. Stephen Koob’s recipe for Paraloid B-72 for archaeological glass was used for adhesion: 81 grams of acetone, 1 teaspoon of fumed silica, and 50 grams of Paraloid B-72.
The adhesive was applied along shard edges using a number #4 synthetic brush, bamboo skewer, or cocktail stick, depending on the shard. Joins were supported with FrogTape® Delicate Surface Painter’s Tape (saturated paper with a proprietary acrylic adhesive) until they finished curing. A heat gun or infrared lamp was occasionally used to soften and improve joins. The final piece to be attached was the bottom of the vessel so that internal access could be maintained as long as possible. Excessive adhesive was cleaned up using acetone on cotton swabs, first on internal joins and then, once reconstruction was complete, on external joins. This was important to maintain the stability of cured joins. As a final measure of support, Hxtal NYL-1 (epoxy resin) was applied sparingly on key joins to stabilise the vessel. Excessive adhesive was cleaned up on day four after application using acetone, cotton swabs, and #15 scalpel.
Japanese tissue was used to support areas of major loss and stabilise surrounding joins. The tissue was first pigmented using Winsor & Newton watercolours and deionised water, impregnated with 20% w/v Paraloid B-72 in acetone on silicone release paper and allowed to dry. Once dry, the pieces could be peeled up and placed over the area of loss so that acetone on a #6 soft-bristle brush could be used to reactivate the Paraloid B-72 and adhere the pieces into position. To achieve the correct shape in Japanese tissue, tracings were made of the loss area using pieces of Melinex (polyester film) which then acted as a guide. In total, five Japanese tissue fills were added.


